Getting Started
UNIHIKER K10
Introuction
UNIHIKER K10 (hereafter only reffered to as K10) is a development and learning board designed for rapid experience and learning of artificial intelligence, which meets the learning needs of programming, IoT and AI. The board integrates LCD color screen, WiFi Bluetooth, camera, microphone, speaker, RGB indicator, multiple sensors and rich expansion interfaces. With the highly integrated on-board resources, sensor control, IoT applications, and artificial intelligence projects such as face recognition, voice recognition, and speech synthesis can be easily realized without the need to connect additional devices during the teaching process.

Feature
- Integrated camera & built-in algorithms for offline image detection
- Integrated microphone & built-in algorithm for offline speech recognition
- Integrated speaker & built-in algorithm for offline speech synthesis
- 2.8-inch colour screen for clearer data presentation
- Rich interface, compatible with multiple programming software, good scalability
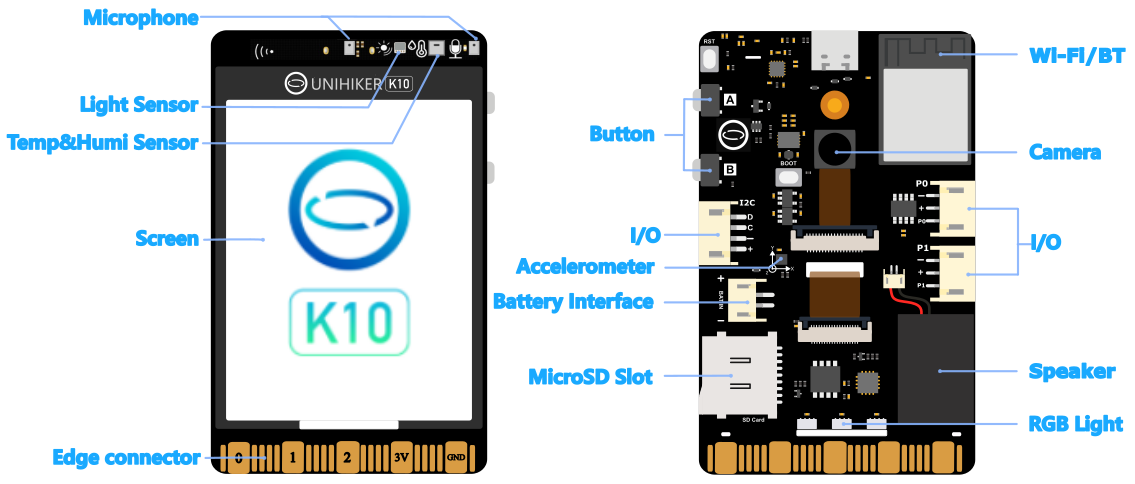
Layout
Quick Start
- Use a USB cable to connect the USB-C to your PC/Mac or to a 5V adapter
- And wait for the K10's screen to display a logo, which means that K10 is ready to go.
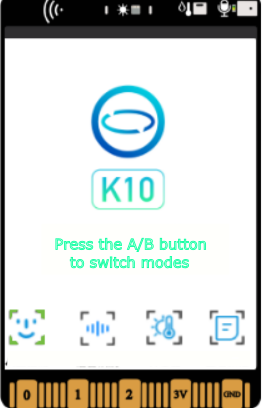
- After successful boot-up, K10 runs the factory built-in program, you can quickly experience the most of the K10 features.
Note
Please make sure the USB cable is plugged directly into the USB port of your computer, do not use intermediate components such as extension cables or USB dock, and make sure the USB cable has a data transfer function.
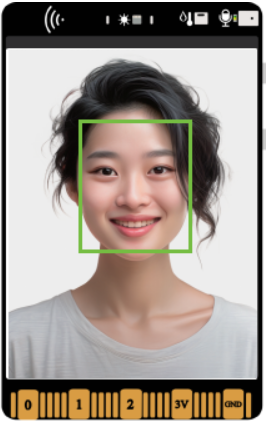
Face Detection Mode
- Press button B to switch to the "Face Detection" mode, when a face appears in the picture taken by the camera, the recognition frame will automatically frame out the face.
Voice recognition Mode
- Press button B again to switch to “voice recognition” mode, you can wake up K10 by speak "Jarvis" or "Hi Telly", then speak command word like turn on the light, turn off the light, play animation, play a game or play music and other operations through the screen prompts, through voice control commands.

Note
To use play music function in the voice recognition mode. You need to prepare a 32G (or below) TF card, and then format it into FAT32 mode, and store a music file with the name of "music.wav" in it to play the music.
Sensor Mode
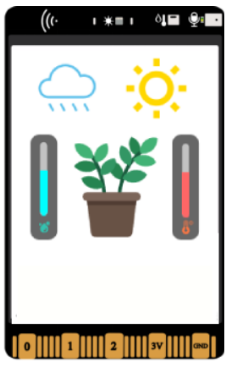
- Press button B again to switch to “Sensor” mode, at this mode the screen will display a plant. When blowing against the temperature and humidity sensor in the upper right corner of the board, it will simulate rain to water the plant; when it doesn't rain for a long time, the plant will wither; when irradiating the ambient light sensor in the upper right corner of the board with a strong light, the sun will become bigger to simulate sunlight; when it rains and there is enough light, the plant will bloom.
QR Display Mode
- Press the button B again to switch to “View Tutorial” mode, and scan the QR code through your cell phone to view the tutorial of K10.

Supported Platform
As an MCU-based development board, the Unihiker K10 is compatible with the following mainstream programming platforms. Please refer to the system requirements for each programming platform to select the appropriate programming software.
| Platform | Platform version requirements | Windows | MacOS | GNU Linux |
|---|---|---|---|---|
| Mind+ | V1.8.1 RC1.0 | ✅ | ❌️ | ❌️ |
| Arduino IDE | All version | ✅ | ✅ | ✅ |
| Platform IO | All version | ✅ | ✅ | ✅ |
| MicroPython | All version | ✅ | ✅ | ✅ |
Tips
Battery Power Supply
After burning a programme for the K10 in Mind+ or other IDE, the programme will be stored in the board's Flash and will not be lost during a power failure, so when the K10 is re-powered it will run the programme that was uploaded last time.
Power Supply
- Supports power supply via Type-C port, 5V DC.
- Supports power supply via on-board PH2.0 battery port, 3.0~6.0V DC. Recommend power source: 3.7V Lipo battery or three AA/AAA cells.
- Supports power supply via edge connector
- Supports power supply via expansion board
TF card
We recommend using genuine SanDisk cards in DFRobot Store: 32GB Class 10. Using an unknown brand of memory card may cause problems such as card read/write failure and program crash. If you use a 32GB or higher memory card, you need to format the card into FAT32 format.
K10 as a card reader
The k10 cna be turned into a caard reader by uploading a special firmware.
Software preparation
Firmware burning
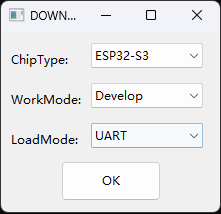
-
After downloading and extracting the Flash download too, run the .exe file and select ESP32-S3.
-
Select hte corresponding file, enter the corresponding address, and check the box at the front.
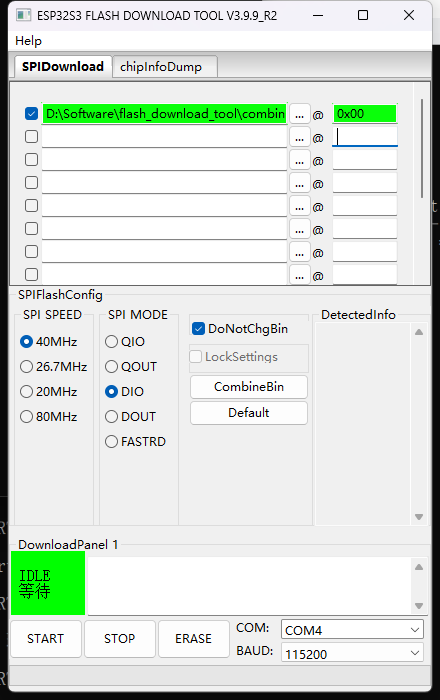
-
Press and hold the BOOT button onthe back of the K10 boars, connect the board to the computer and select the corresponding port on the software.
-
First, click "ERASE" to clear the flash file. After siccesful clearing, click "START" to burn the file.
-
After the burning process is completed, press the "RST" reset button on the blank K10 boars, insert the TF card, and you can access the TF card on your computher in the same way as accessing files on a USB drive.
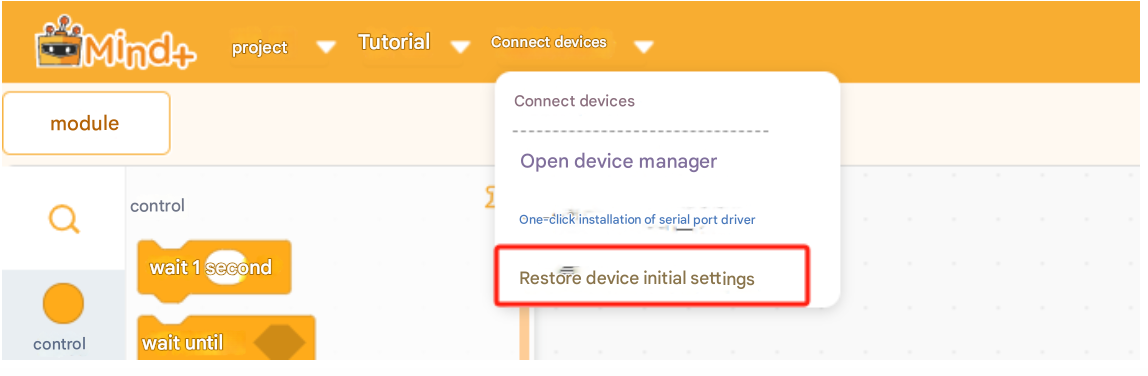
Restoring initial settings
Note: After flashing the card reader firmware, to use the graphical mode in Mind+ again, you need to restore the initial settings of the K10 in Mind+ V1
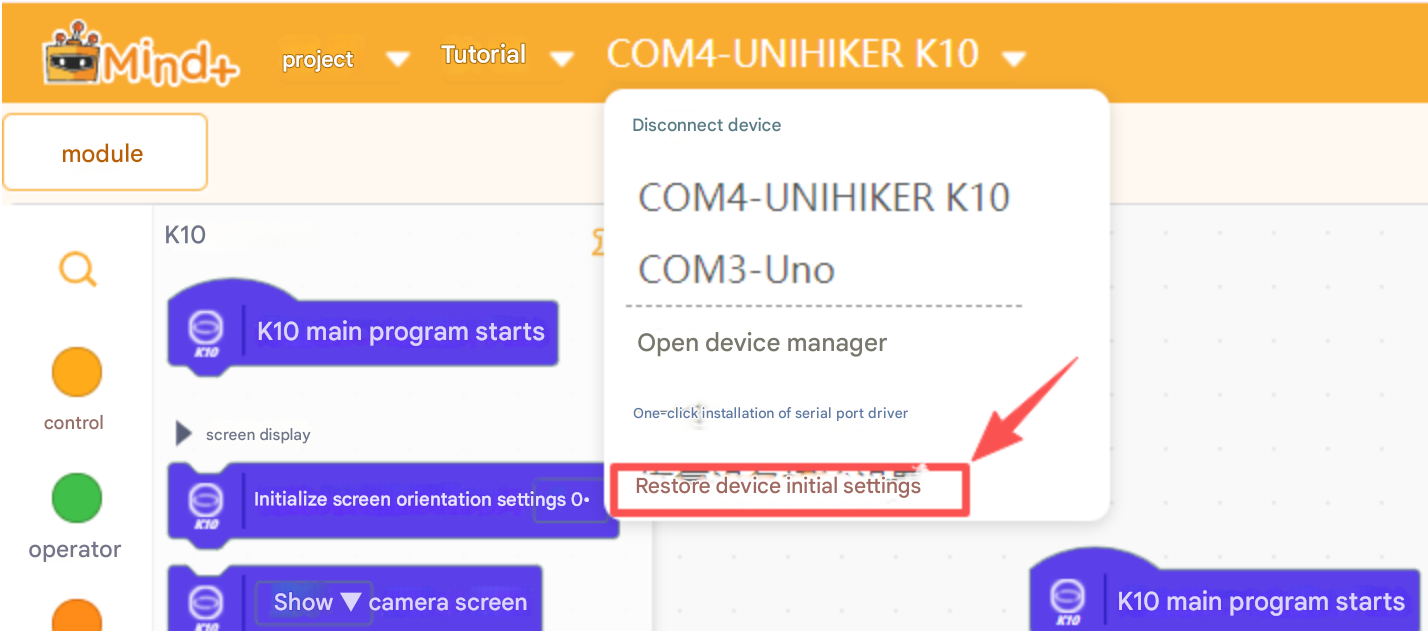
or connect the K10 in Mind+ V2 and click erase.
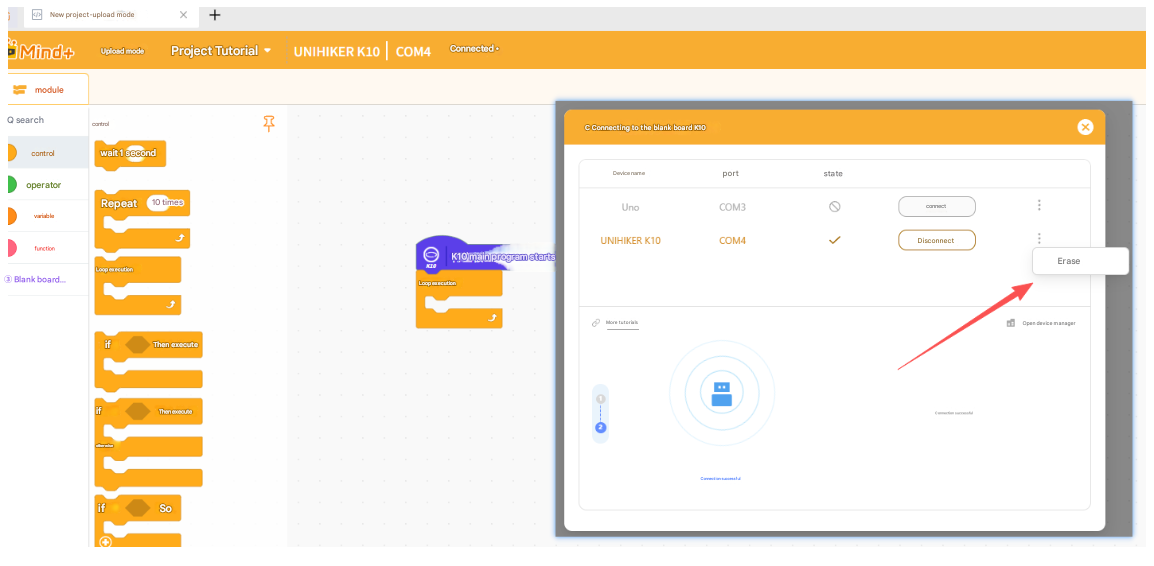
To restore, first press and hold the boot button, then connect the data cable. Once the port is recognized, release the boot button. Then click "Restore Initial Settings." After completion, press the RST button on the board to reset and finish the restoration process.